I am sure you have been seeing the Kubernetes widely used in technology circles and wanted to explore yourself.But you are overwhelmed with the amount of resources available on the internet, the complexity involved in learning might make you loose interest or hesitant in trying the things out.
Following my recent experience with creating a test bed to learn Kubernetes,I was able to consolidate the steps for setting up a single node cluster quickly and adding a second node at the end.Thanks to this post, I found while searching on Kubernetes resources.
Assuming you already aware of
- Preparing EC2 machines.
- Using security groups or Firewalls.
- looking in to official documentation in case of issues.
Lets begin..
Preparing base machine
Create an EC2 machine with Ubuntu AMI. Attach a security group to the machine with below ports open for communication between the nodes and to use the dashboard later,from the official installation steps here

The machine should now be ready for serving as Master Node
Installing Kubernetes
Following the steps from the linked post at the beginning
Install Docker
Proceeding with the installation of Docker, most used container runtime for Kubernetes
curl -fsSL https://download.docker.com/linux/ubuntu/gpg | sudo apt-key add -

sudo add-apt-repository "deb [arch=amd64] https://download.docker.com/linux/ubuntu $(lsb_release -cs) stable"

sudo apt update && sudo apt install docker-ce
Install Kubernetes
Installation commands for Kubernetes,Kudeadm and Kubelet
sudo apt-get update && sudo apt-get install -y apt-transport-https && curl -s https://packages.cloud.google.com/apt/doc/apt-key.gpg | sudo apt-key add -

echo "deb http://apt.kubernetes.io/ kubernetes-xenial main" | sudo tee -a /etc/apt/sources.list.d/kubernetes.list && sudo apt-get update

sudo apt install -y kubeadm  kubelet kubernetes-cni
Turn off the swap on Ubuntu Server
swap has to be turned off on Ubuntu due to compatibility issues.
sudo swapoff -a

sudo sed -i '/ swap / s/^\(.*\)$/#\1/g' /etc/fstab
Check Docker and Kubernetes Version
Confirm if the installation have been completed as expected
docker -v

kubectl version
Prepare node using Kubeadm
With all the installation completed we are good to initialize master node using Kubeadm command using the Ec2 Ip address and you can use your custom cidr address,10.244.0.0/16 is used here
sudo kubeadm init --pod-network-cidr=10.244.0.0/16 --apiserver-advertise-address=EC2Ipaddr --ignore-preflight-errors=NumCPUThe output of the above command shows the successful control-plane initialized message
To use Kubernetes as non-root user we need to run the commands below
mkdir $HOME/.k8s

sudo cp /etc/kubernetes/admin.conf $HOME/.k8s/

sudo chown $(id -u):$(id -g) $HOME/.k8s/admin.conf

export KUBECONFIG=$HOME/.k8s/admin.conf

echo "export KUBECONFIG=$HOME/.k8s/admin.conf" | tee -a ~/.bashrc
Configure cluster networking
We need to install one of the Container Network Interface (CNI) Network providers from here to have the networking exist between the Cluster,Nodes and Pods
We are installing Flannel
kubectl apply -f https://raw.githubusercontent.com/coreos/flannel/master/Documentation/kube-flannel.yml

kubectl apply -f https://raw.githubusercontent.com/coreos/flannel/master/Documentation/k8s-manifests/kube-flannel-rbac.yml
Make Master node as Worker
In a single node cluster we need to use taint to run worker pods on Master.
kubectl taint nodes --all node-role.kubernetes.io/master-We can check the Pods and Nodes using the commands below.
kubectl get pods

kubectl get nodes
First deployment
Glad you have come so far , we are good to deploy our first application on to the cluster.
we will deploy hello-world application from google.Once deployed, inorder to use the application from outside the cluster we need to use Nodeport.
For now, we will just run the command instead of dwelling into the details of Nodeport
kubectl create deployment hello-world-nodeport \
--image=gcr.io/google-samples/hello-app:1.0
kubectl expose deployment hello-world-nodeport \
--port=80 --target-port=8080 --type NodePort
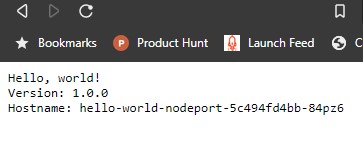
kubectl get servicePost running the commands our service should be run running and access using the EC2hostname
NODEPORT=$(kubectl get service hello-world-nodeport -o jsonpath='{ .spec.ports[].nodePort }')

curl http://EC2hostname:$NODEPORT
Scaling the service
With everything setup and working we can try scaling up our application by using replica sets.
kubectl scale deployment hello-world-clusterip --replicas=6This command would increases the pods to 6 and we confirm this by refreshing the above endpoint,which randomly connects to any one of the running pods.
Delete deployment
You can use below cleanup commands to tear down the deployment.
kubectl delete service hello-world-nodeport

kubectl delete deployment hello-world-nodeport
Adding the second node
If you are interested to venture further, we can join one more Ubuntu EC2 as the second node.
Follow all the steps same as Master node preparation until you initialize with Kubeadm.
Then get the join command from the Master node using
kubeadm token create --print-join-commandRun the command on the new EC2 machine and we should see the two nodes serving in the cluster.
Please note the ports which had to be opened for the communication.
Conclusion
Great work if you reached so far and completed the set up of Kubernetes cluster,this setup can serve you in exploring most of the features and learn new things.